Filling of return is not only filling of return but its data submission to the government. Therefore filling of return is very sensitive work.
In this article we are going to lean about how to file GSTR-3B online? I am going to explain in this article about how to file gst return online step by step. GSTR-3B format has been given by the government and return is to be filed in that format.
GSTR-3B meaning
GSTR-3B is return under Section 39 of CGST Act 2017, where both
Every registered person, for every calendar month or part thereof, furnish, a return, electronically, of inward and outward supplies of goods or services or both, input tax credit availed, tax payable, tax paid and such other particulars, in GSTR-3B form.
So now we can say that GSTR-3B is return under Section 39 of CGST Act 201
GSTR-3B return filling
In GSTR-3B filling, there are two types of GSTR-3B returns 1) Nil return 2) Other than Nil return.
Nil return can be filed if there is no outward supply (Sales) and no inward supply (Purchase) and not any other tax liability in that period.
First lets understand how to file GSTR-3B nil return
How to file GSTR-3B nil return
GST nil return filling can be explained by the following steps
nil return filling in GST
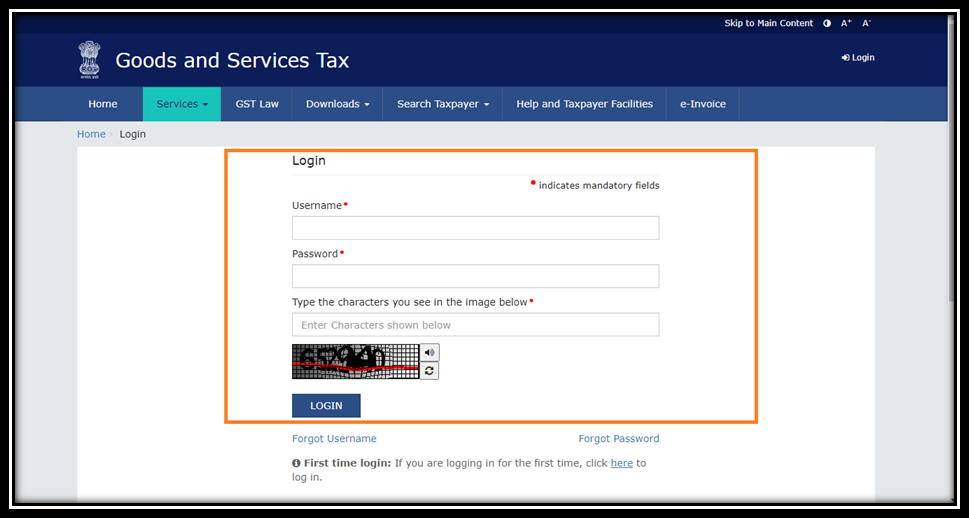
Step-1- Login in to WWW.gst.gov.in with Username and Password (provided at time GST Registration).
how to file nil GST return
Step-2– Dashboard will be displayed with Return filling status of Last 5 returns (To be filed or Filed or Not filed)
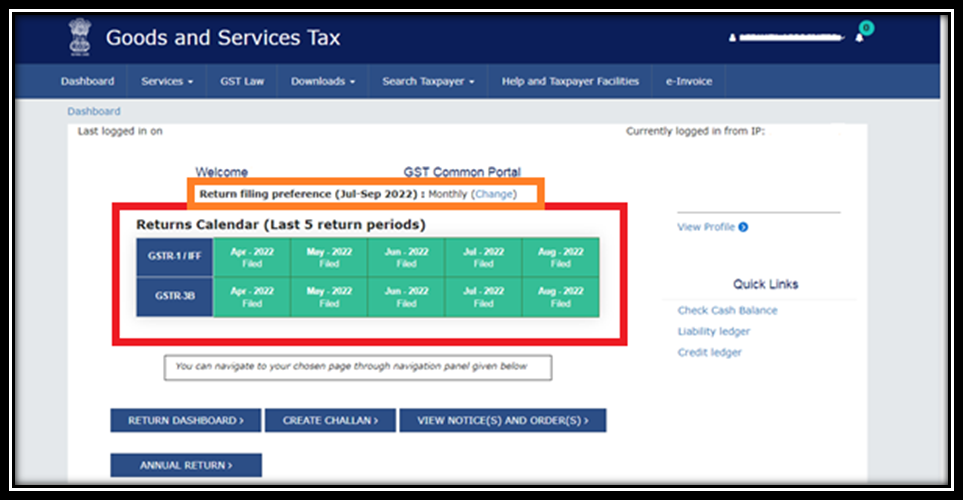
You can change Return filling Preference from Monthly to Quarterly on this Dashboard by clicking on Change.
Step-3– Go to Return Dashboard–> File return Page will displayed

- Select the Options of Financial Year, Quarter, & Period from drop down list for which you want to file the return & —> Click on Search.
- In case of Quarterly return —-> filed return on Last month of Quarter. E.g. for 1st quarter (April to June) —> return will be filed in June i.e. last month of quarter.
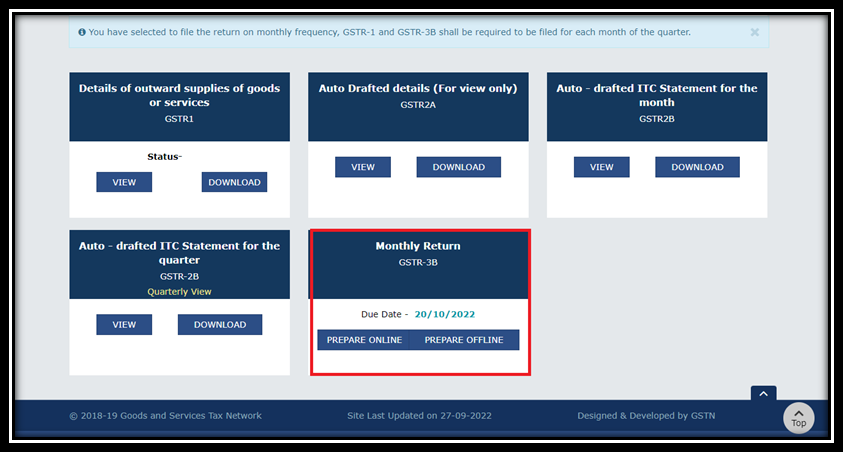
Step-4– Different Tiles for return filling will be displayed with due date of filling return which tax payer required to file —> Select in Monthly return GSTR-3B —-> Prepare online button.
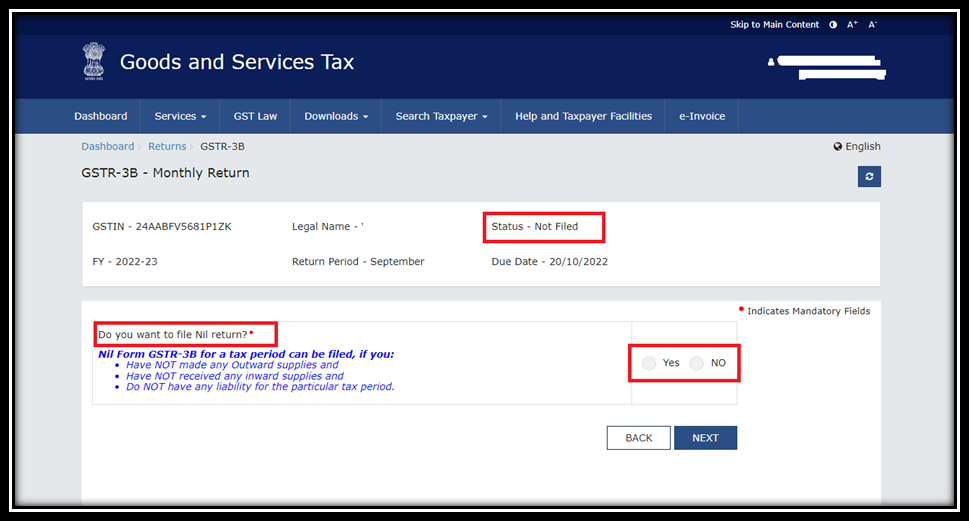
Step-5- Questions to be answered before proceed further for “Nil Return”
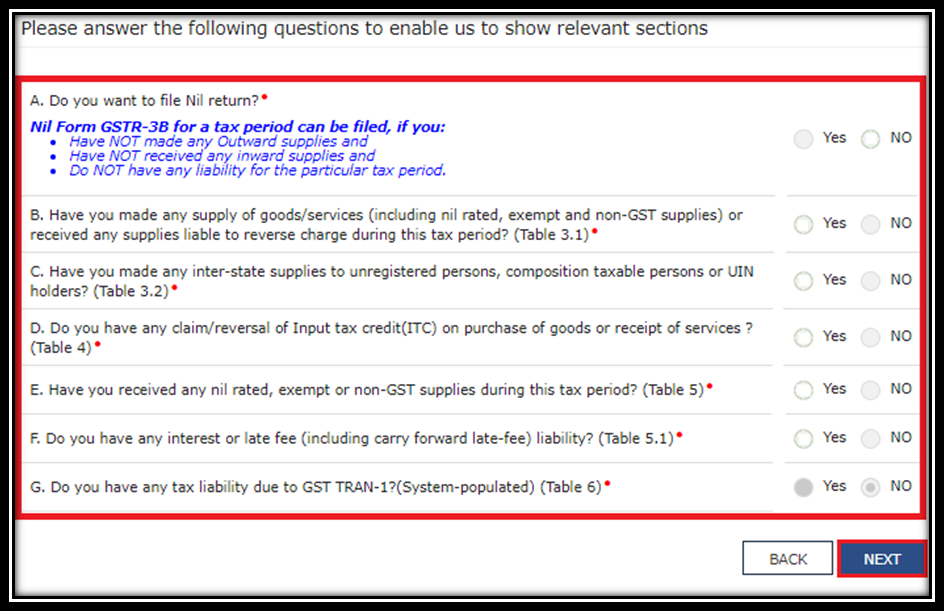
- List of questions will be displayed
- Select “YES” in the first question
- Answer the other questions as per applicability
- Select Next button
- Based on the answers, relevant tables of Form GSTR-3B will be displayed
- Click the back button, if you want to go back to previous page.
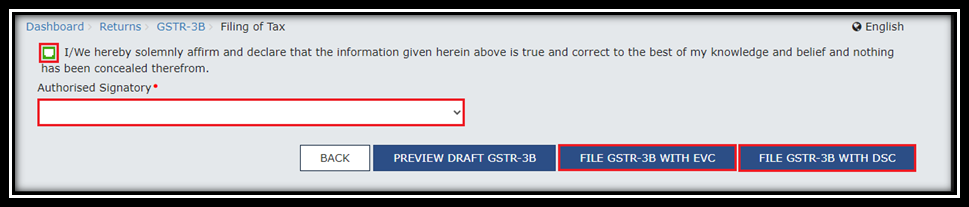
Step-6– After List of Questions–> Select the check box for declaration and select authorized signatory —> click the GSTR-3B file with DSC/EVC button.
Step-7- In case of EVC —-> OTP will be sent on registered Mobile No —-> Enter the OTP —-> Return will be filed.

Step-8– Message is displayed on successful filing return —-> Press OK

- After Filling Return, Status of GSTR-3B will be changed to “Filed”, you can click ‘View GSTR-3B’ to view GSTR-3B return.
So this was the process of GSTR-3B nil return filling.
How to file GSTR-3B other then NIL?
In Case of GSTR-3B other than NIL follow below steps-:
Steps 1 to 4 as above mentioned will be applicable here also
Step-5– After selection of Prepare online GSTR-3B (as per step-4 above) —> the system generated summary for GSTR-3B is displayed with source from, Form status, summary status and advisory.

Press close button in order to file further GSTR-3B Monthly return
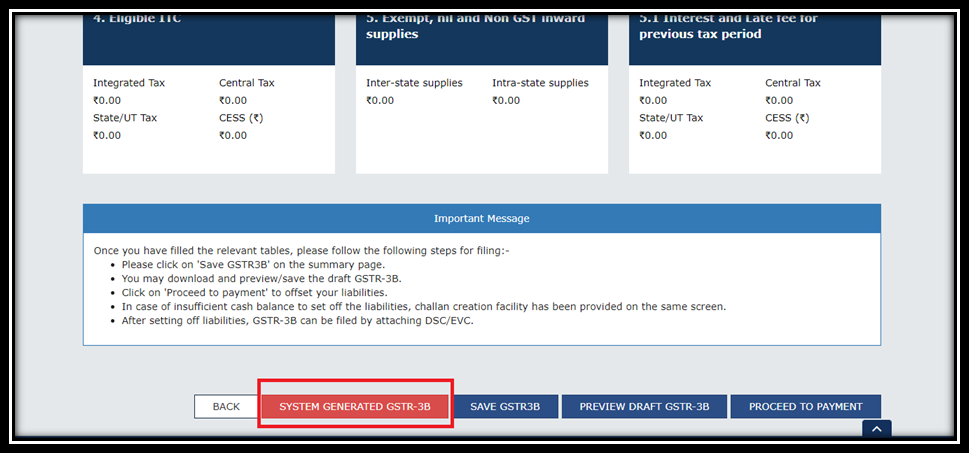
Step-6 System generated GSTR-3B on monthly return Page
- On GSTR-3B monthly return Page —> click system generated GSTR-3B for download and view system computed details from GSTR-1 & GSTR-2B (Monthly & quarterly) in form GSTR-3B.
- One can able to edit the auto populated values if required. You can file GSTR-3B with edited values without any barriers from the Systems.
Step-7 Information required at time of filling GSTR-3B
Details of outward supplies and inward supplies liable to reverse charge
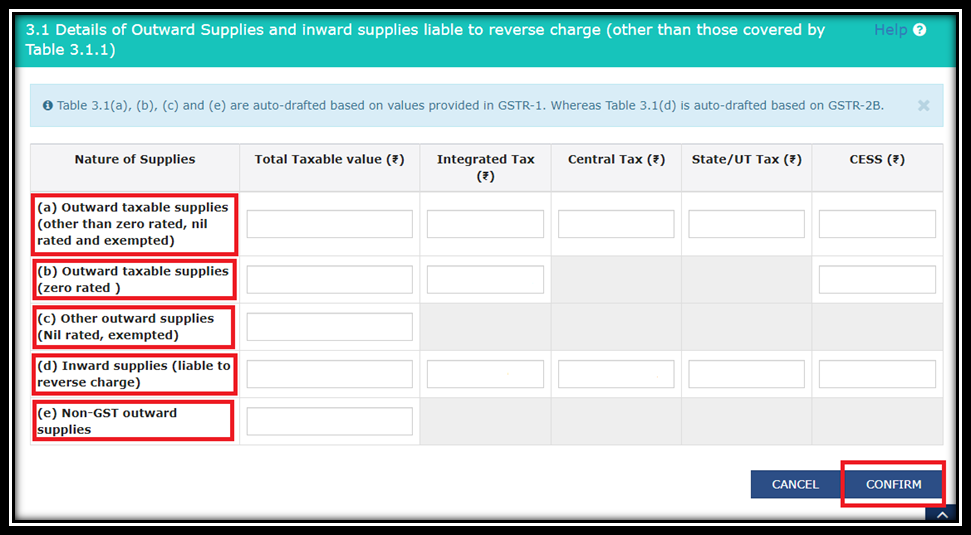
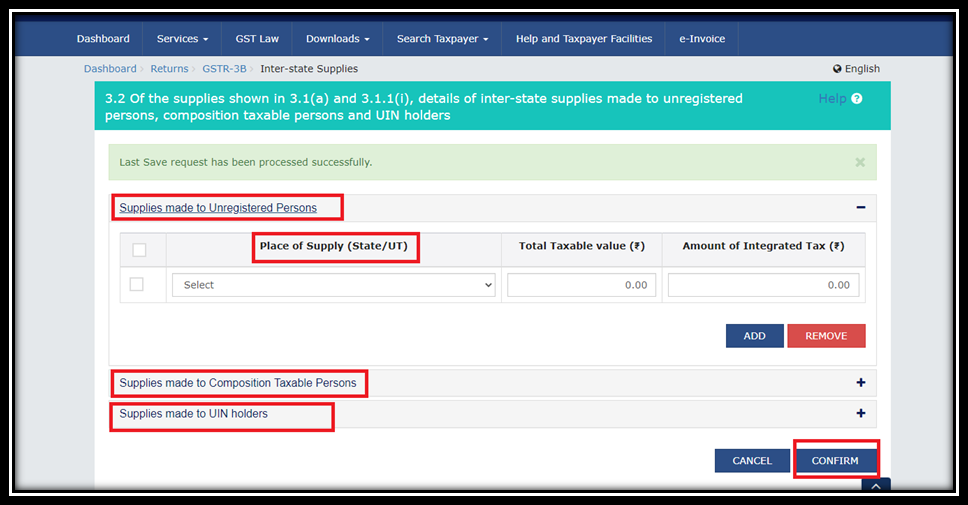
- Sales showing other than in table no.3.1 & following sales required to be entered as per Place of supply
| Interstate supply to -: | Unregistered person Composition Taxable person UIN Holders |
Data for the table is auto populated from GSTR-1 which can be edited later on.
Note:
Press the “Add” button to provide details of Interstate supply to URD is more than one. However, if you want to remove added data, select the checkbox on the left and then click on the “remove” button. The system will accept only one entry for each place of supply. Please note that the details of tax paid on exports cannot be entered here.

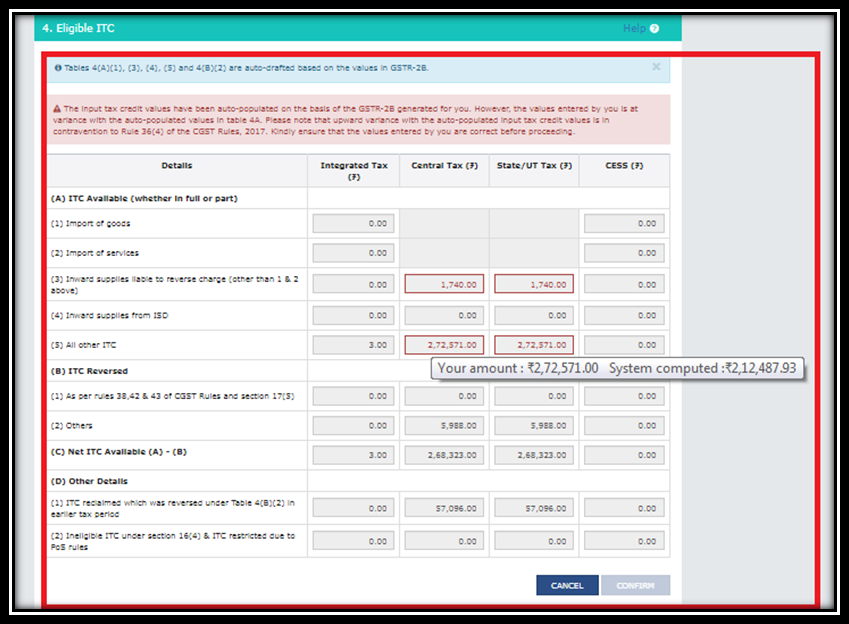
Details of ITC available, ITC reversed and other details like in eligible ITC under 16(4) & restricted due to POS rules and ITC reclaim which is reversed in earlier months. ITC claimed/ reversed are auto populated from GSTR-2B in GSTR-3B which can be modified.
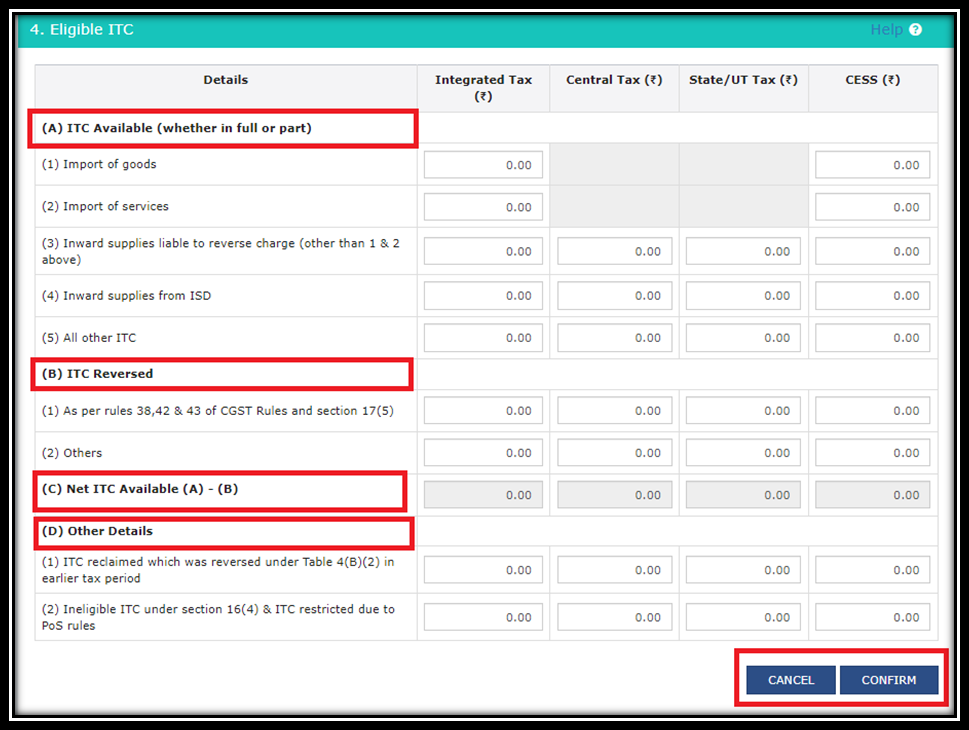
If the data entered by you in 4A & 4B having Variance with the system generated value, then such field will be highlighted with red border. The updated tile on the dashboard will be in red colour as well.
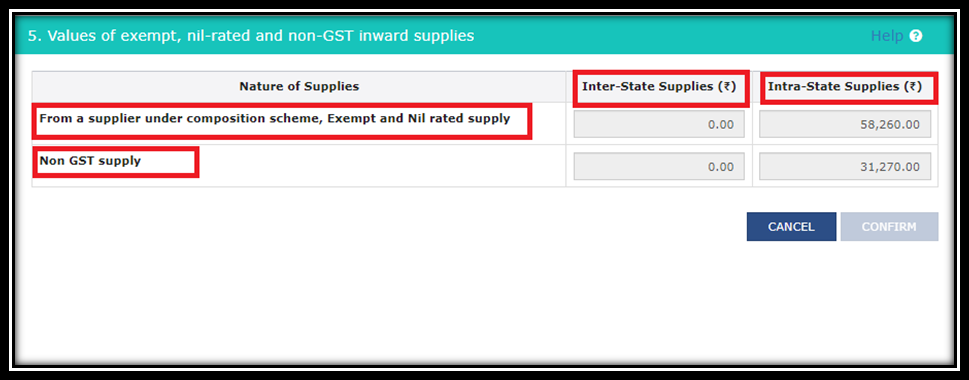
Details of Exempt ,Nil rated supply and Non-GST supply like Electricity expense ,Petrol & diesel expense
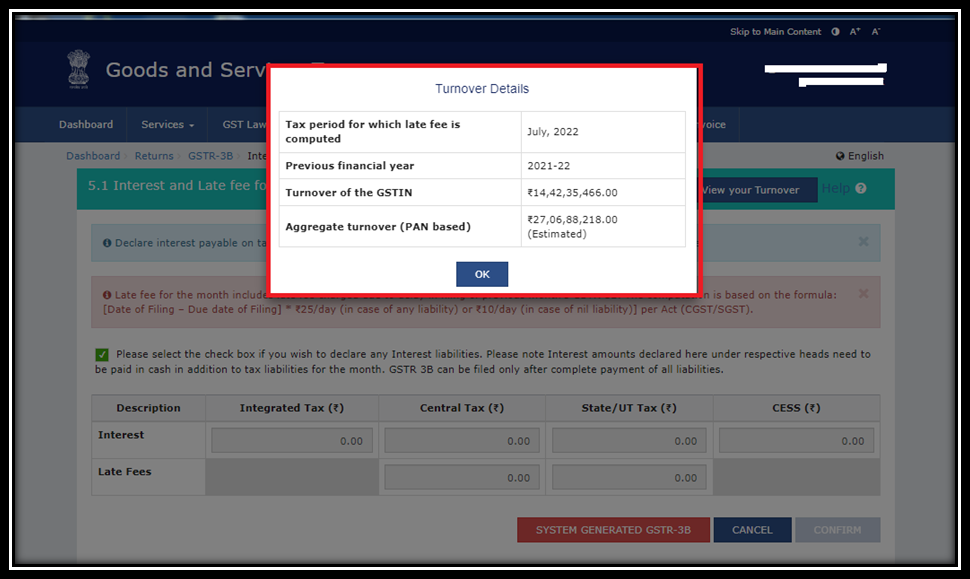
- Details of Interest & Late fees for previous tax periods under IGST, CGST, SGST & UTGST and cess. Late fee is system generated based on the number of days passed after the due date of filling.
- Late fees is calculated for period from due date to actual date of filling return Rs.*25/- day in case of any liability, Rs. 10/-day in case of no liability as per CGST/SGST Act.

One more tab is available on the same page for better clarity purpose that is View your Turnover, which provides previous month turnover & previous financial turnover for such GSTN.
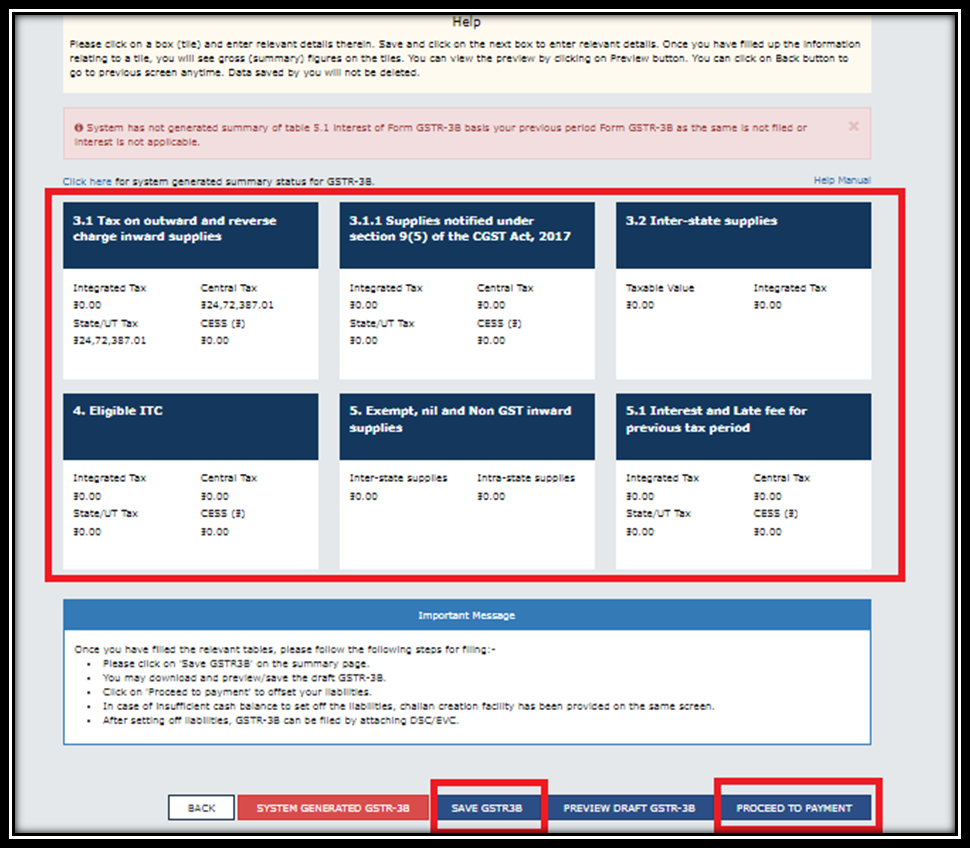
Step-8 Save the GSTR-3B Form
- After providing all information in below tiles, you can save the GSTR-3B Form.
- After you saved a message is displayed on the top of the page confirming that your data is successfully saved
- go to Proceed for payment.
Step-9 Proceed to Payment for the GSTR-3B Form
Cash Ledger show the balance of Tax, Interest and late fees while credit ledger shows credit taken after all the reversal.
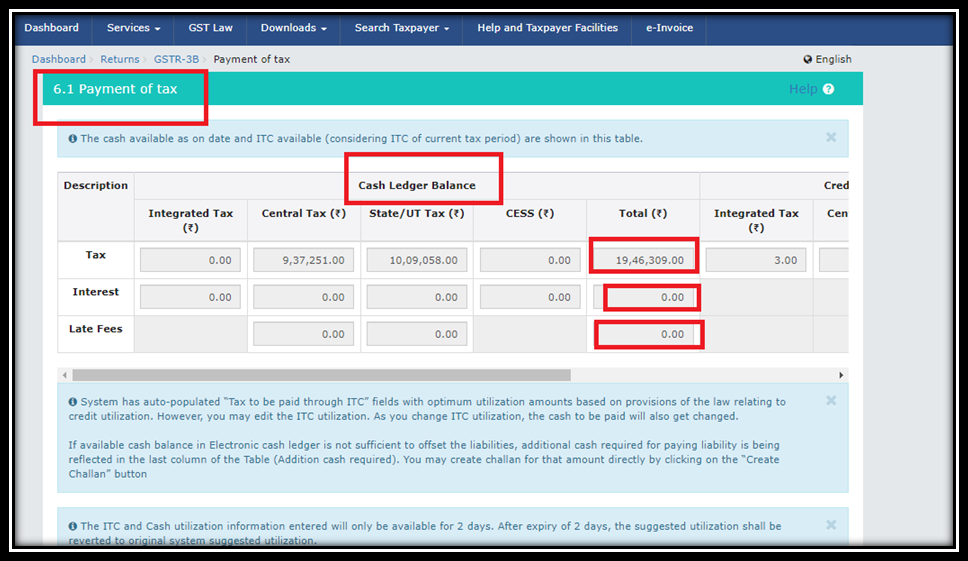

Utilization of credit ledger balance under different heads are available to see on the portal.

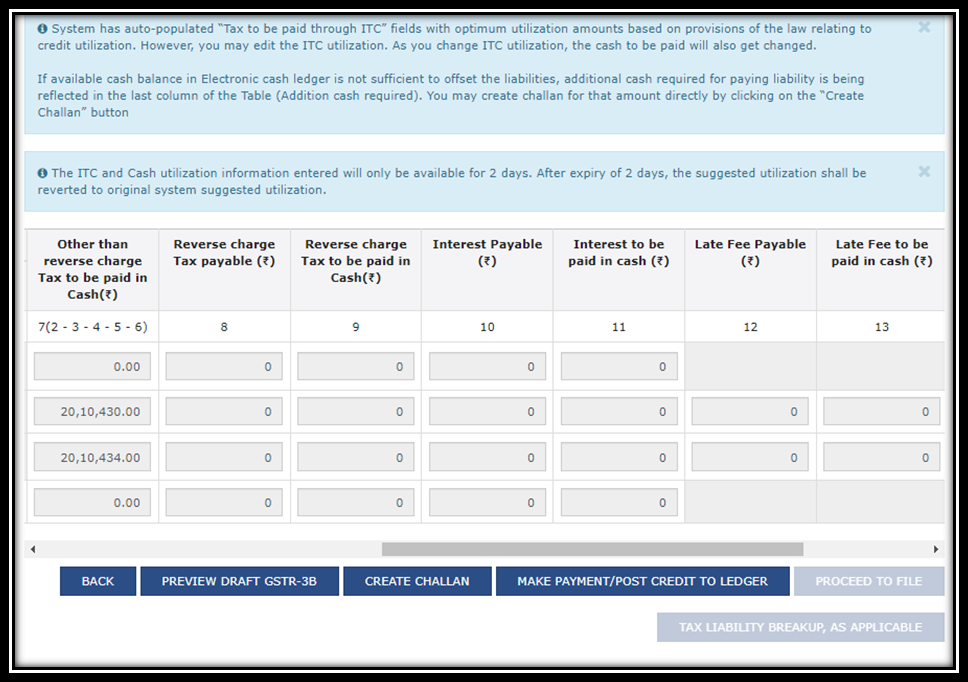
- After utilizing the credit, the amount required to pay in cash will available to see on the portal, and for that amount you can create challan directly from here.
- If in the cash ledger having enough balance to pay off the liabilities, then you are not required to create challan.
- You can click on the Make payment / post credit to ledger and proceed further.
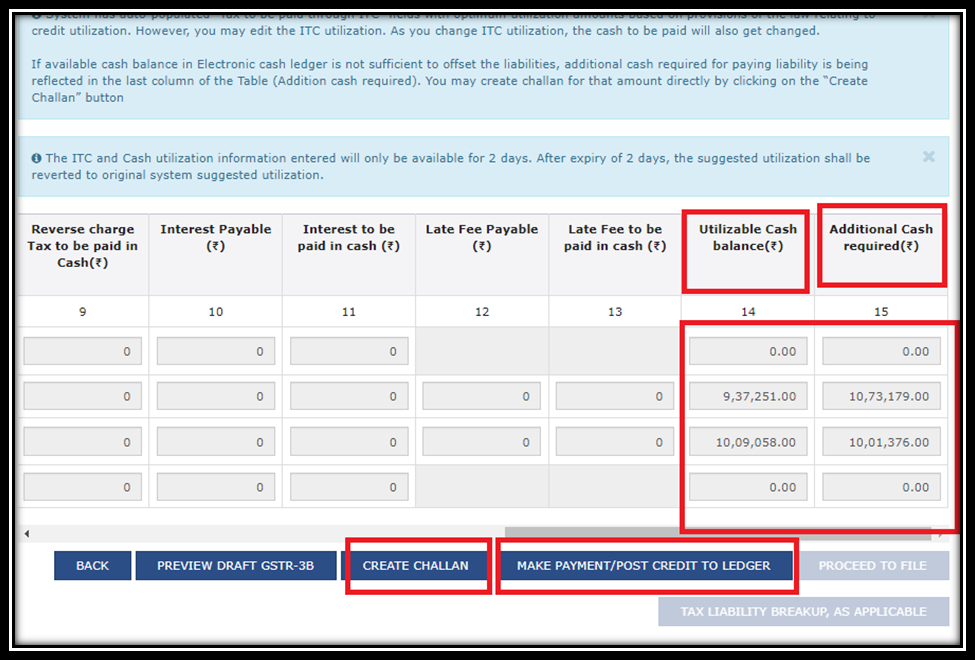
Step-10 Payment by selecting payment modes
- If cash balance in Electronic cash ledger is less than the amount needed to offset the liabilities you are required to create challan directly from the portal by selecting proper payment modes.
- After payment same amount will reflect in Cash Ledger and you can pay off the liabilities on the portal by selecting Make payment / post credit to ledger.
- After the selection of Make payment / post credit to ledger button you cannot able to change any information for ITC and others in the above tiles it will get freezed.
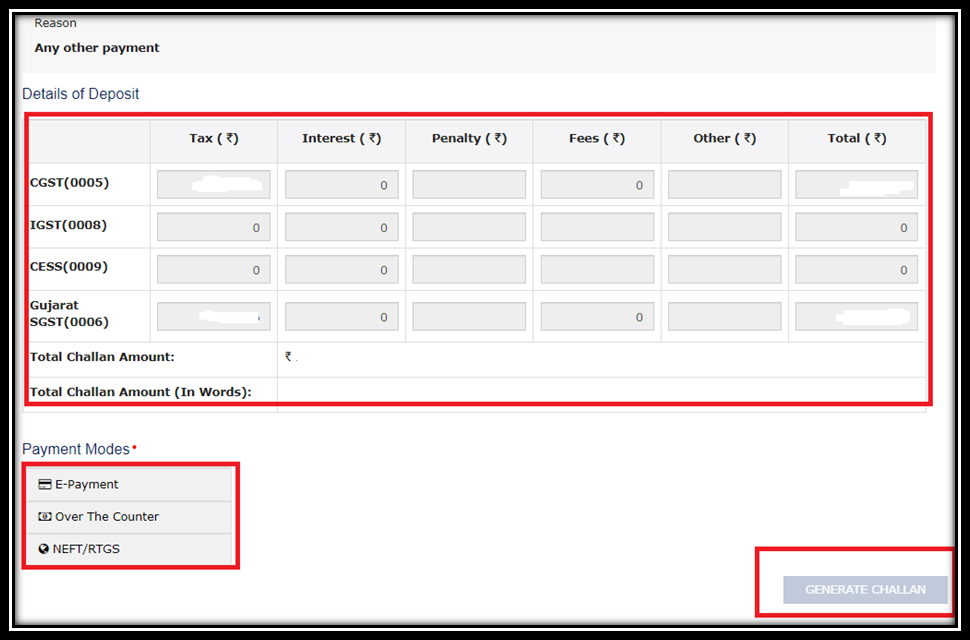
Needs to Know –
- In case of Net Banking select the bank and GST portal will direct you on the respective bank’s Login Page. After the successful payment you will redirected to GST portal where the transaction status will be displayed.
- In case of NEFT/RTGS payment mode, you will required to print the challan and visit the selected bank. A mandate form will generated simultaneously. You will have to pay through banks cheque with selected branch.
- In case of over the counter payment mode, you will have to take a printout of the challan and visit the selected bank. You will then have to pay by appropriate mode within the challan’s validity period. Status of the payment will be updated on the GST portal after confirmation from the bank.
Step-15 Filling GSTR-3B with EVC or DSC
- Select the check box for declaration and select authorized signatory —> click the GSTR-3B file with DSC/EVC button.
- In case of DSC —-> click the drop down —-> Select authorized signatory —-> click file GSTR-3B DSC —> Enter password to decrypt DSC—–> Return will filed and Message will displayed on the screen of successful filling of GSTR-3B.

In case of EVC —-> OTP will be sent on registered Mobile No —-> Enter the OTP —-> Return will be filed.

- Message is displayed on successful filing return —-> Press OK
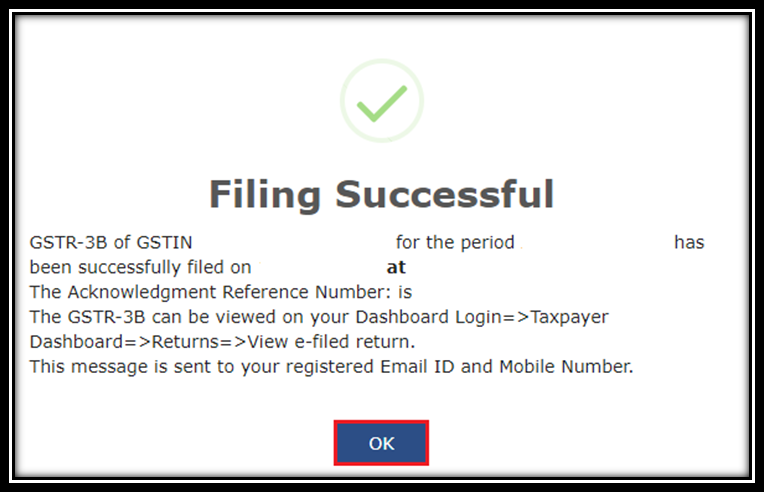
- After Filling Return, Status of GSTR-3B will be changed to “Filed”, you can click ‘View GSTR-3B’ to view GSTR-3B return.
Similar article